Tutorial: Develop on Anyscale
Tutorial: Develop on Anyscale
This tutorial provides an introduction to developing Ray code using Visual Studio Code on Anyscale. The Anyscale console provides Visual Studio Code for all running workspaces.
If you don't have access to an Anyscale Workspace, see Tutorial: Create a workspace.
Develop with VS Code
You can use VS Code in Anyscale to develop code in a similar fashion to how you might write code on your personal machine. You can author assets including Ray code, Python modules, arbitrary programs, and configuration files.
Complete the following steps to develop and run a simple Ray program:
-
Navigate to a running Anyscale Workspace.
-
In the top menu, click the VS Code tab.
-
Create a new file and name it
hello_world.py.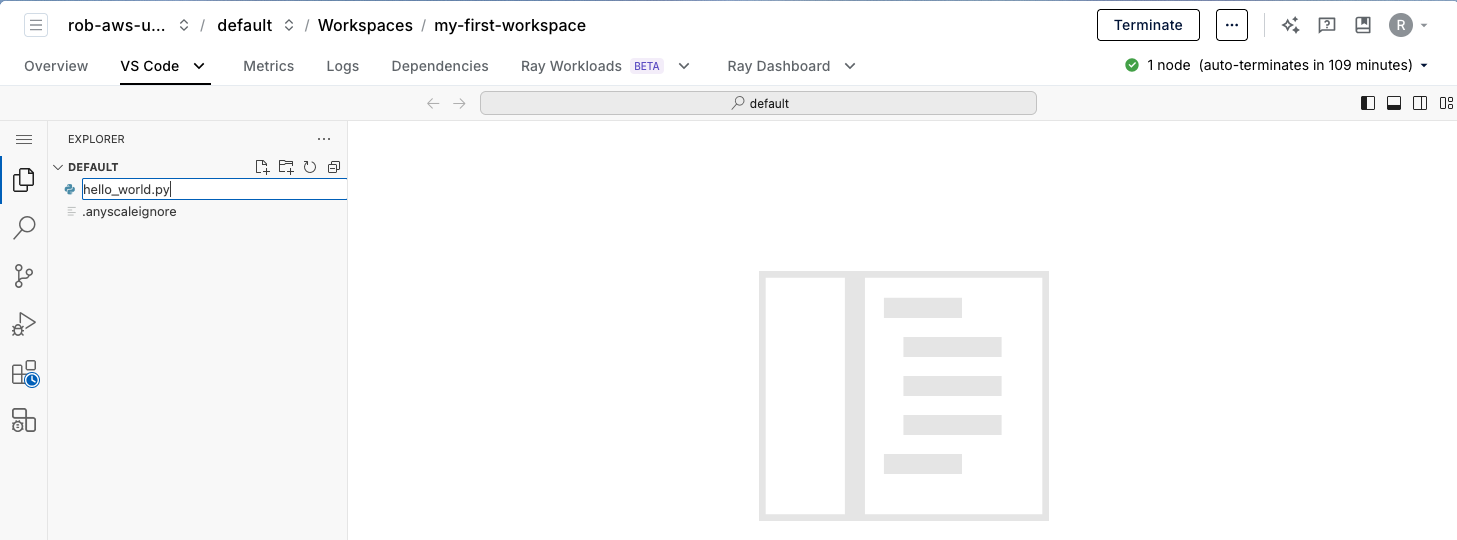
-
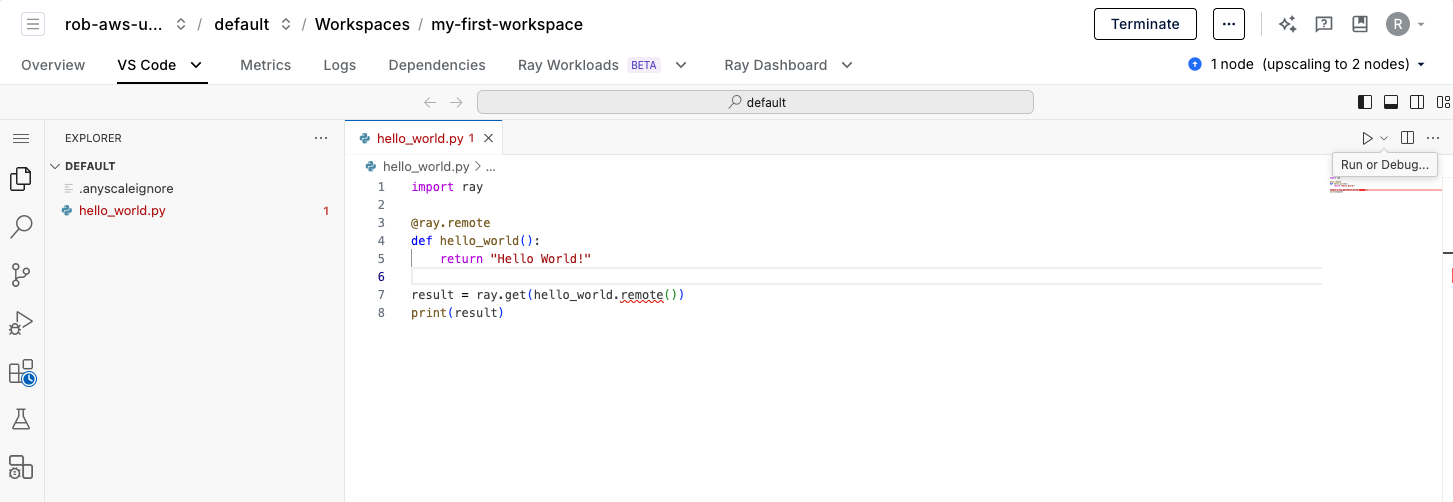
Add the following Ray code to the
hello_world.pyfile:
import ray

@ray.remote
def hello_world():
   return "Hello World!"

result = ray.get(hello_world.remote())
print(result) -
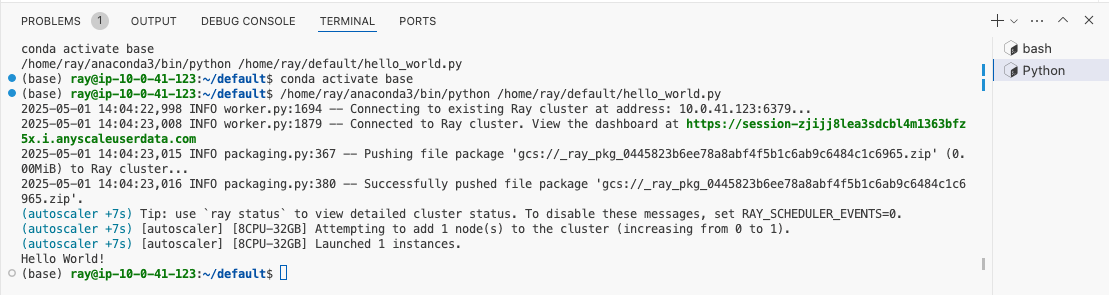
In the top-right corner, click ► to submit the Python file to the cluster.
When you run Ray code, the autoscaler adds worker nodes to your cluster if they're needed to run your code. The workload results display in your terminal once the workload completes.
Add dependencies to a workload
To demonstrate dependency management, install the emoji package to your workspace and add a 👋 emoji to the hello_world.py Ray application. Complete the following steps:
-
Update the code in the
hello_world.pyfile to the following:import emoji
import ray
@ray.remote
def hello_world():
return emoji.emojize("Hello World! :waving_hand:")
result = ray.get(hello_world.remote())
print(result)VS Code warns that it can't resolve the
emojipackage. -
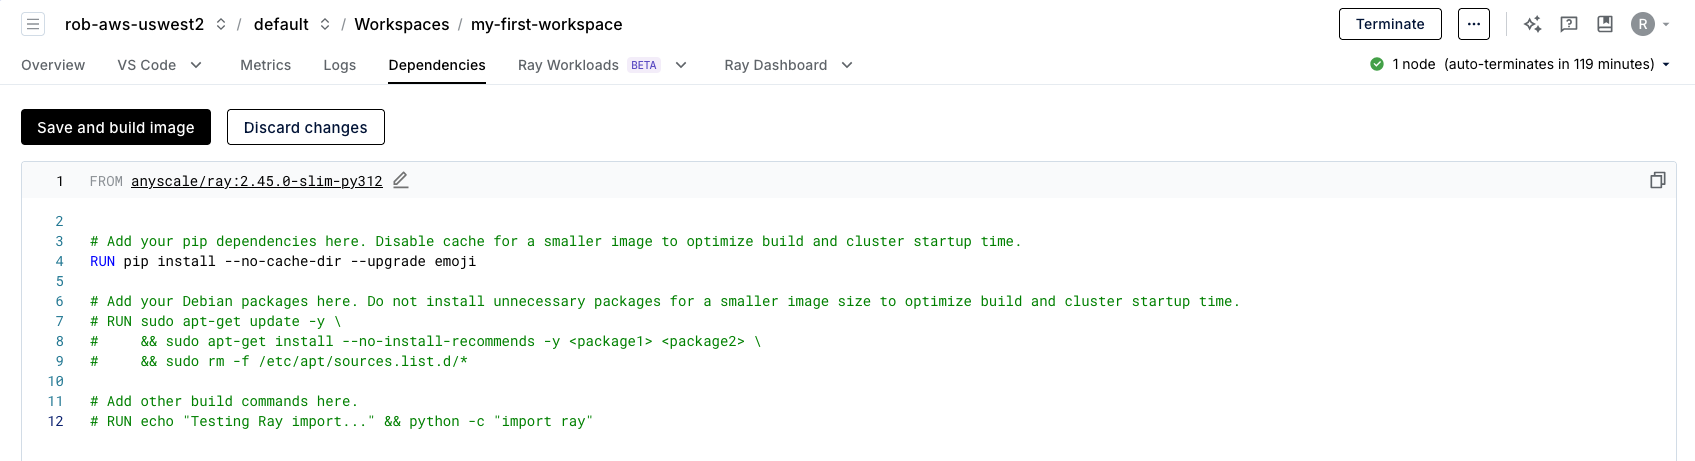
Navigate to the Dependencies tab in the workspace navigation bar.
-
Click Edit containerfile and add the following line to the editor:
RUN pip install --no-cache-dir --upgrade emoji
-
Click Save and build image and wait for the container image to build.
The following notification displays in the Dependencies tab:
All new Ray workers launched will use the updated container image. Restart the workspace to use the new image for the head node.
-
Click Restart workspace.
-
Once the workspace restarts, return to VS Code and run your
hello_world.pyscript.

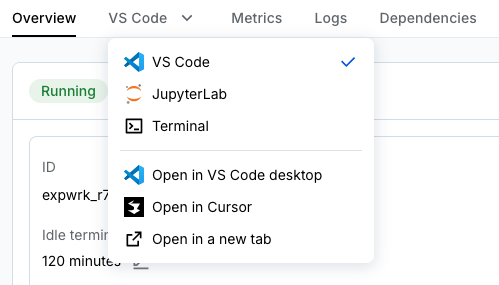
Develop with other IDEs
Aside from the built-in VS Code environment, you can also use JupyterLab and a terminal from the web UI. You can also open the workspace locally in your own IDE through SSH. We support VS Code and Cursor directly from the UI, or you can configure your own IDE to connect to the workspace.
Click the VS Code tab in the top navigation bar to select your IDE of choice: