Announcing the New Anyscale Design
We're excited to roll out a new experience on the Anyscale platform to improve performance and help you be more productive. Keep reading to learn about what's new and to try it out today.
What's changed
-
Simplified UX: The new design reduces conceptual complexity and delivers a consistent experience across the UI and CLI, allowing you to easily self-onboard.
-
Better observability: We developed a range of new features around logging and monitoring to enhance your experience.
-
Unified developer experience: Work with all controls and artifacts in one view, so you don’t need to jump between screens.
Highlights
-
New CLI/SDK: The new APIs are more user-friendly and include support the new dependency management flow. It's backward compatible with previous CLI/SDK versions, so you can continue using all the old commands.
-
Logs: The unified log viewer feature allows you to view and filter all events across clusters.
Note that when you enable the log viewer feature, you'll send us logs for processing in the Anyscale control plane, which may require you to go through security review based on your company policies.
When using Anyscale runtime version 2.32 or higher, logs automatically output with JSON formatting and include additional metadata. If you have set up log exporting with Vector, make sure your transformations are compatible with JSON logs.
-
Application templates: Browse new templates to help you quickly learn how to scale your workloads and customize them to fit your use case.
-
Serverless option: Now, you can scale your cluster to find the right accelerator for your needs.
-
Large language model endpoints: Deploy and query open source large language models through the Anyscale Platform.
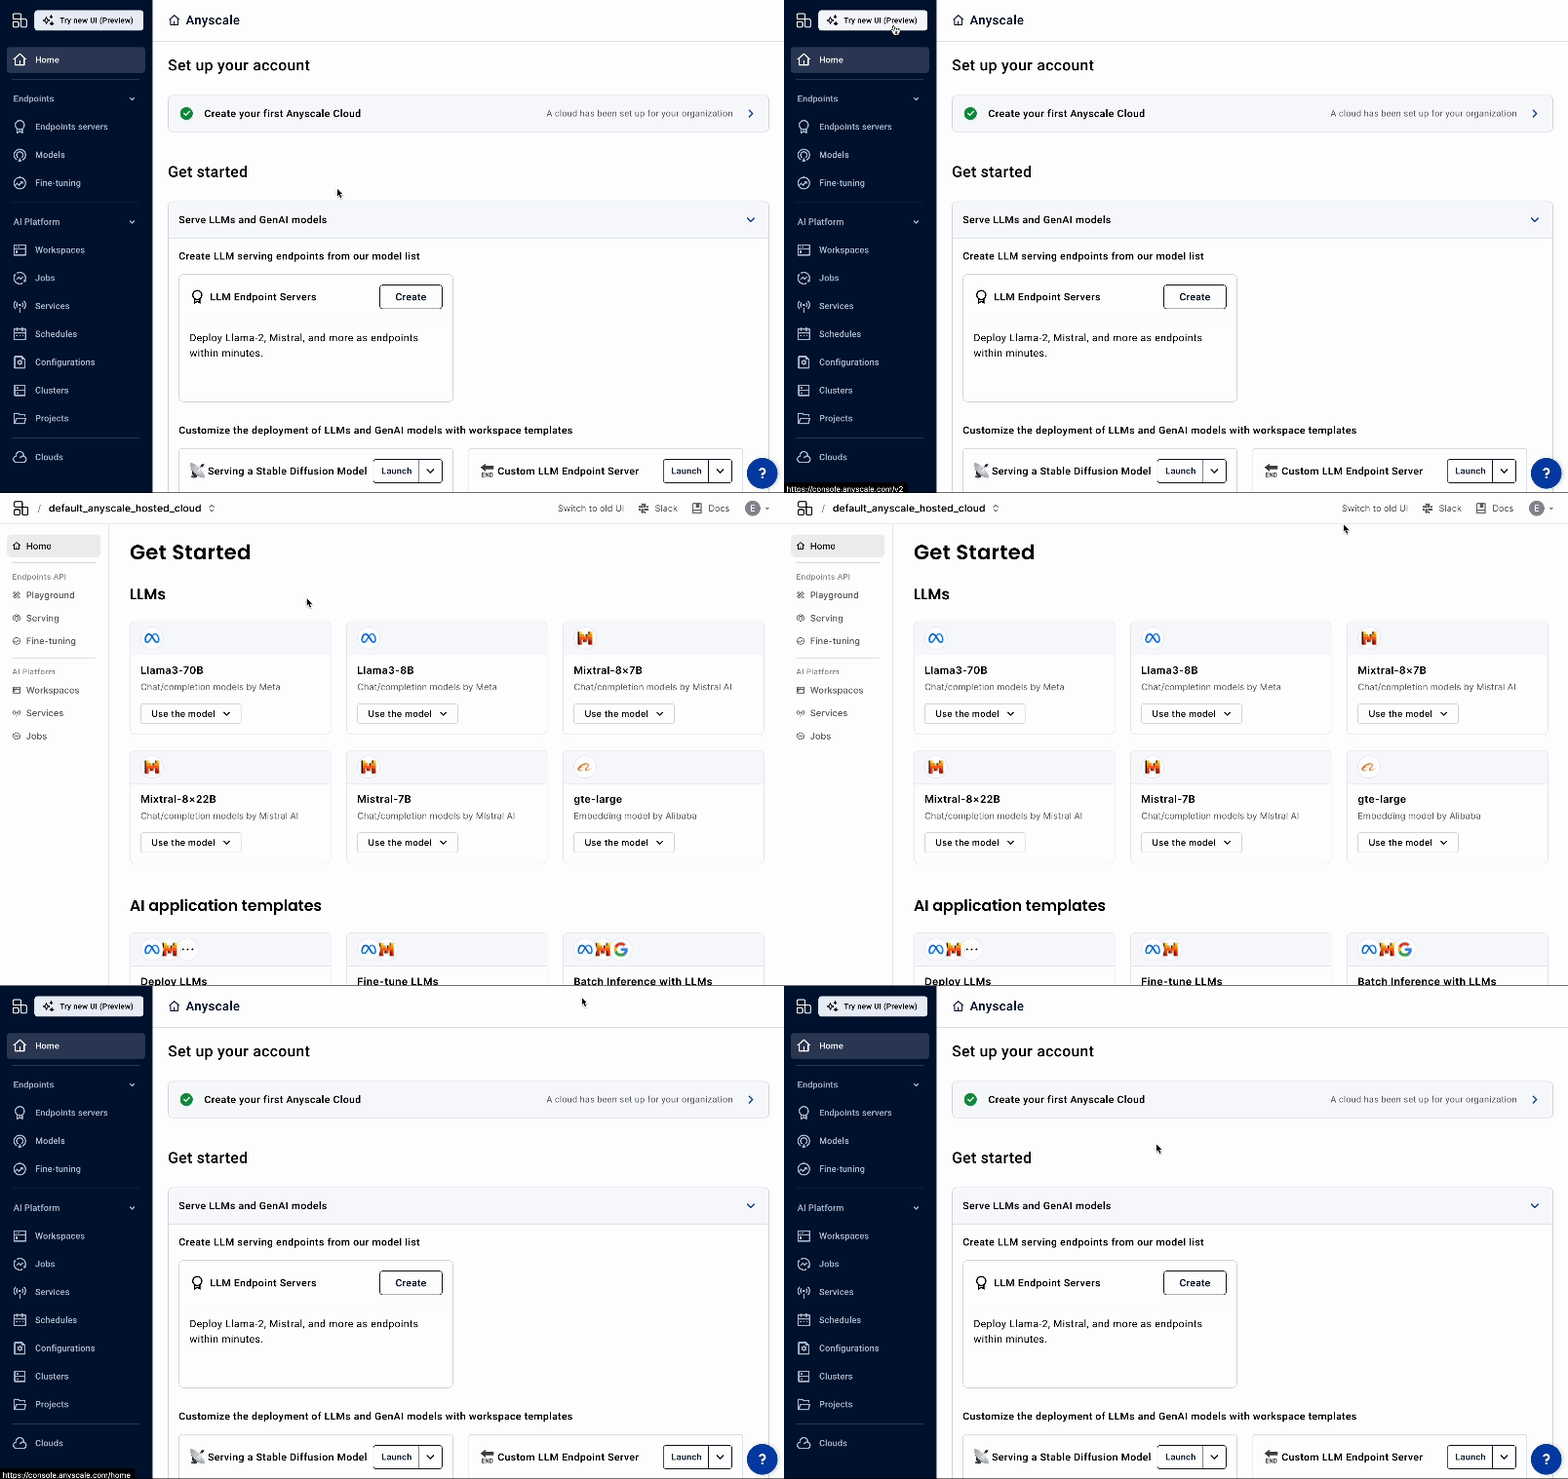
Switching between the old and new UI
For a limited transition period, you'll be able to switch between the old and new design using the Try new UI (Preview) and Switch to old UI buttons.
Important changes
Cluster environments to images
-
New dependency management flow: In the new design, managing dependencies is simpler and more intuitive. In workspaces, you can add and remove packages in the Dependencies tab, equivalent to
pip install PACKAGE_NAME, instead of usingpip install --user PACKAGE_NAME. The workspace automatically tracks all packages that you install. -
Container images: We've moved to a unified Docker-like experience that replaces cluster environments. You can rebuild an image after changing your dependencies with a single button click. All existing cluster environments are automatically converted into container images. See Build an image to learn more.
-
Seamless migration: When you move to the new design, all dependencies and images are available in the new UI.
Due to the conceptual change in cluster environments, if you start iterating on your dependencies in the new design and create a new image, you won't be able to edit them in the old UI. You'll only be able to continue working on them in the new UI.
With the introduction of greater flexibility, you can't rely on the stability of the image at all times. Verify that all the installations are complete after you make changes to dependencies, as changes may be still in progress.
Head node scheduling behavior
To enforce best practices, head node scheduling is disabled by default for multi-node clusters when using the new UI and SDK.
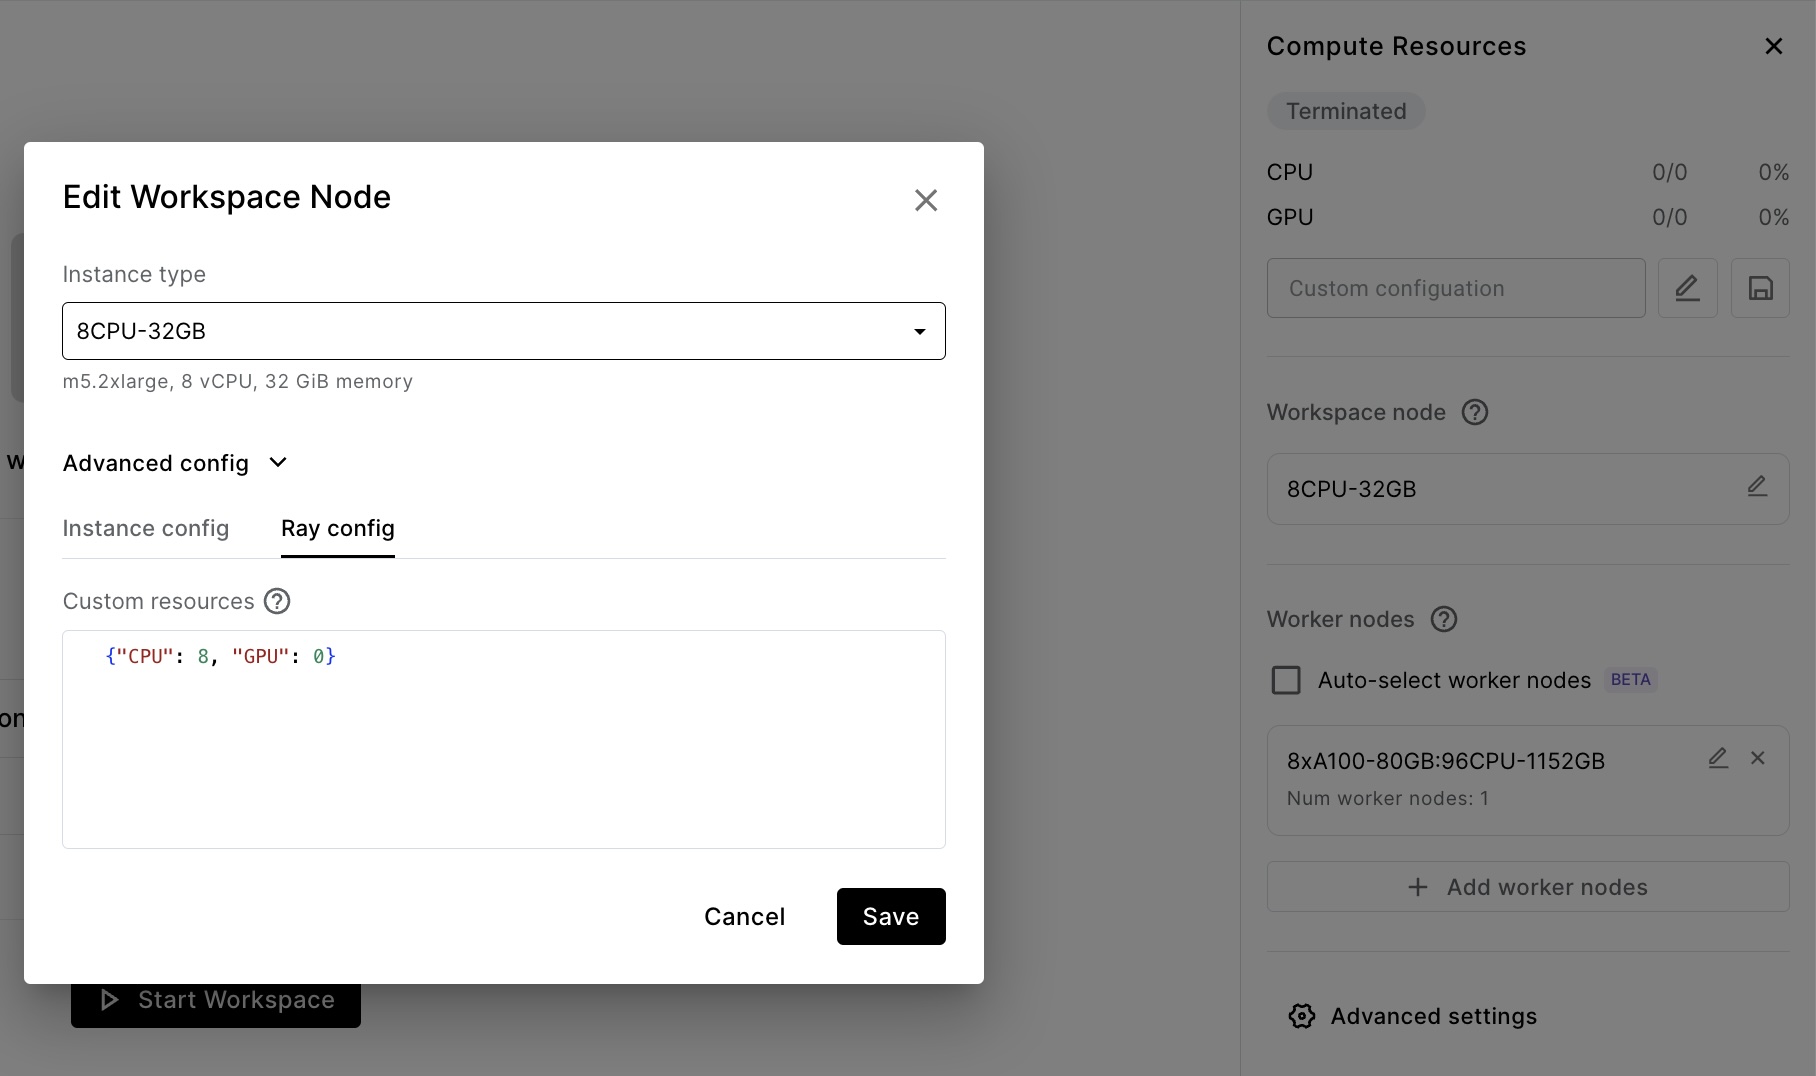
To continue scheduling workloads on the head node, add logical resources to the head node that indicate the shape of the instance.
- SDK
- UI
For single-node clusters (those without worker nodes specified), all compute runs on the head node.
head_node:
    - instance_type: m5.2xlarge

worker_nodes: []
For multi-node clusters (those with auto-selected workers), all compute runs on worker nodes, and head node scheduling is disabled.
head_node:
    instance_type: m5.2xlarge
For multi-node clusters (those with worker nodes configured), all compute runs on worker nodes, and head node scheduling is disabled.
head_node:
    instance_type: m5.2xlarge

worker_nodes:
    - name: gpu-group
      instance_type: p4de.24xlarge
Head node scheduling may be achieved by specifying logical resources for the head node.
head_node:
    instance_type: m5.2xlarge
    resources:
        CPU: 8
        GPU: 0

worker_nodes:
    - name: gpu-group
      instance_type: p4de.24xlarge
For single-node clusters (those without worker nodes specified), all compute runs on the head node.
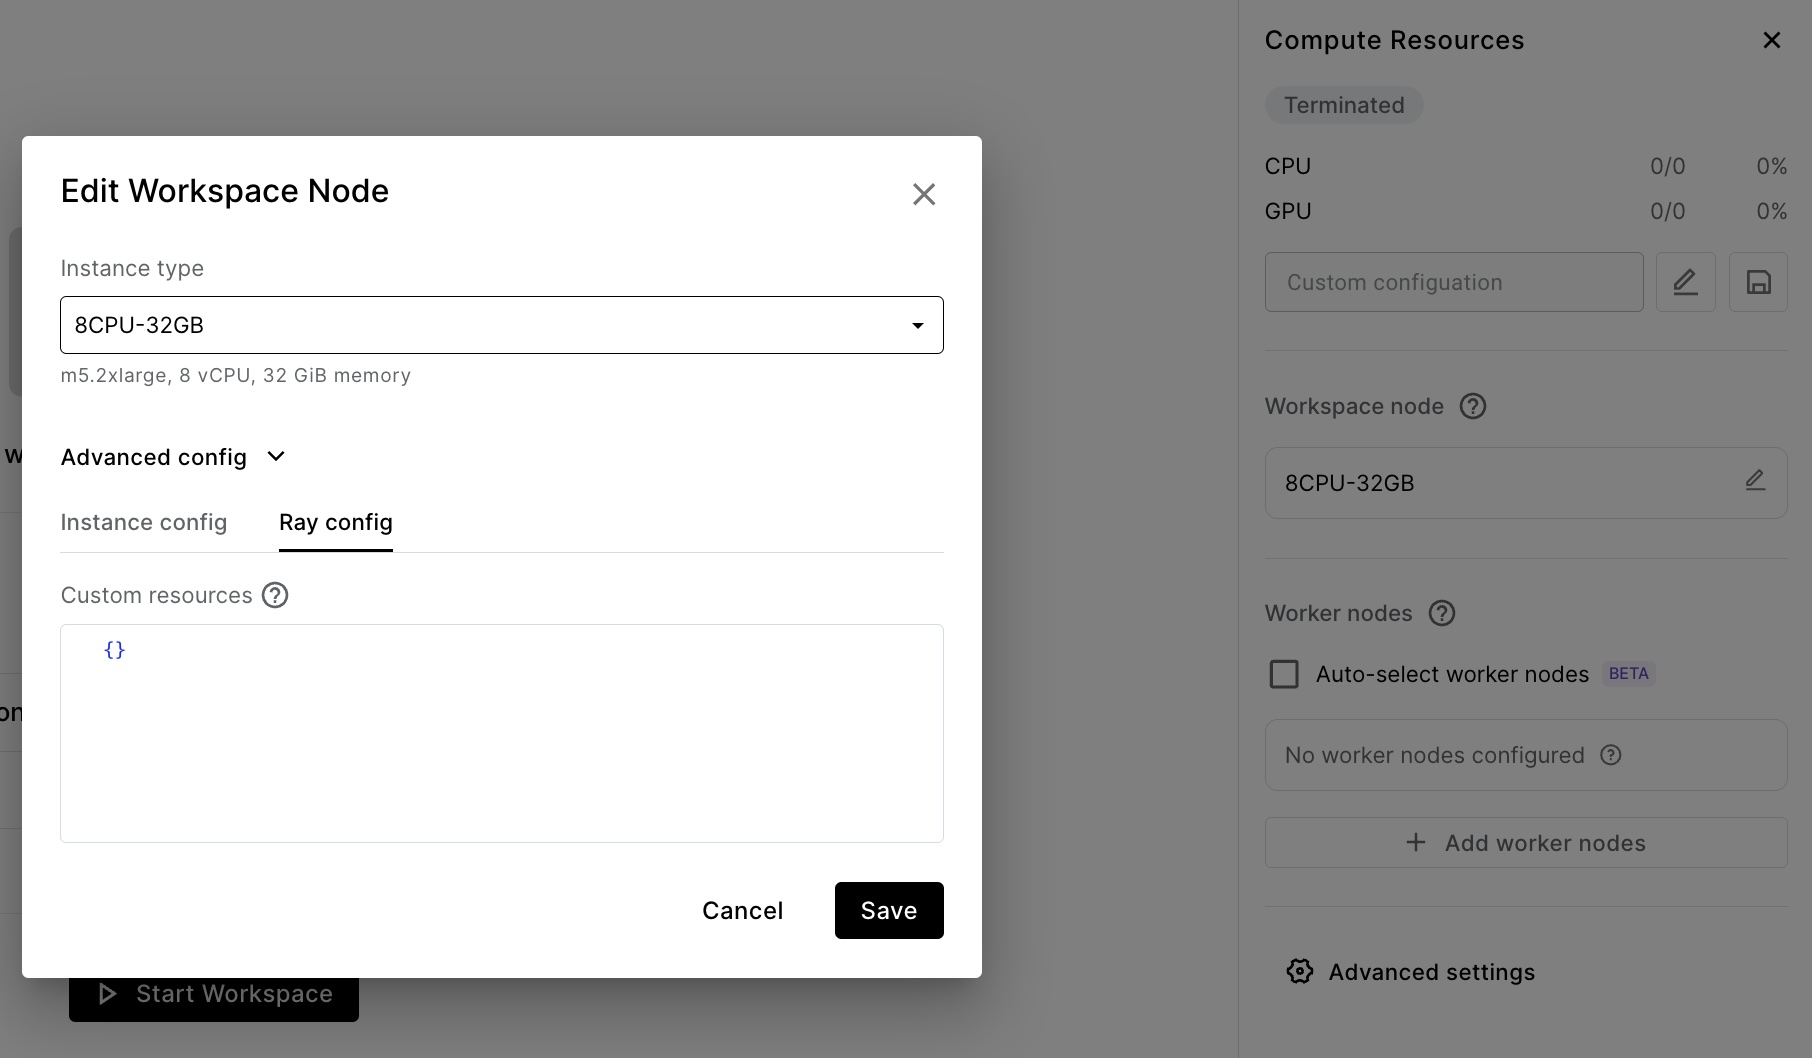
For multi-node clusters (those with auto-selected workers), all compute runs on worker nodes, and head node scheduling is disabled.
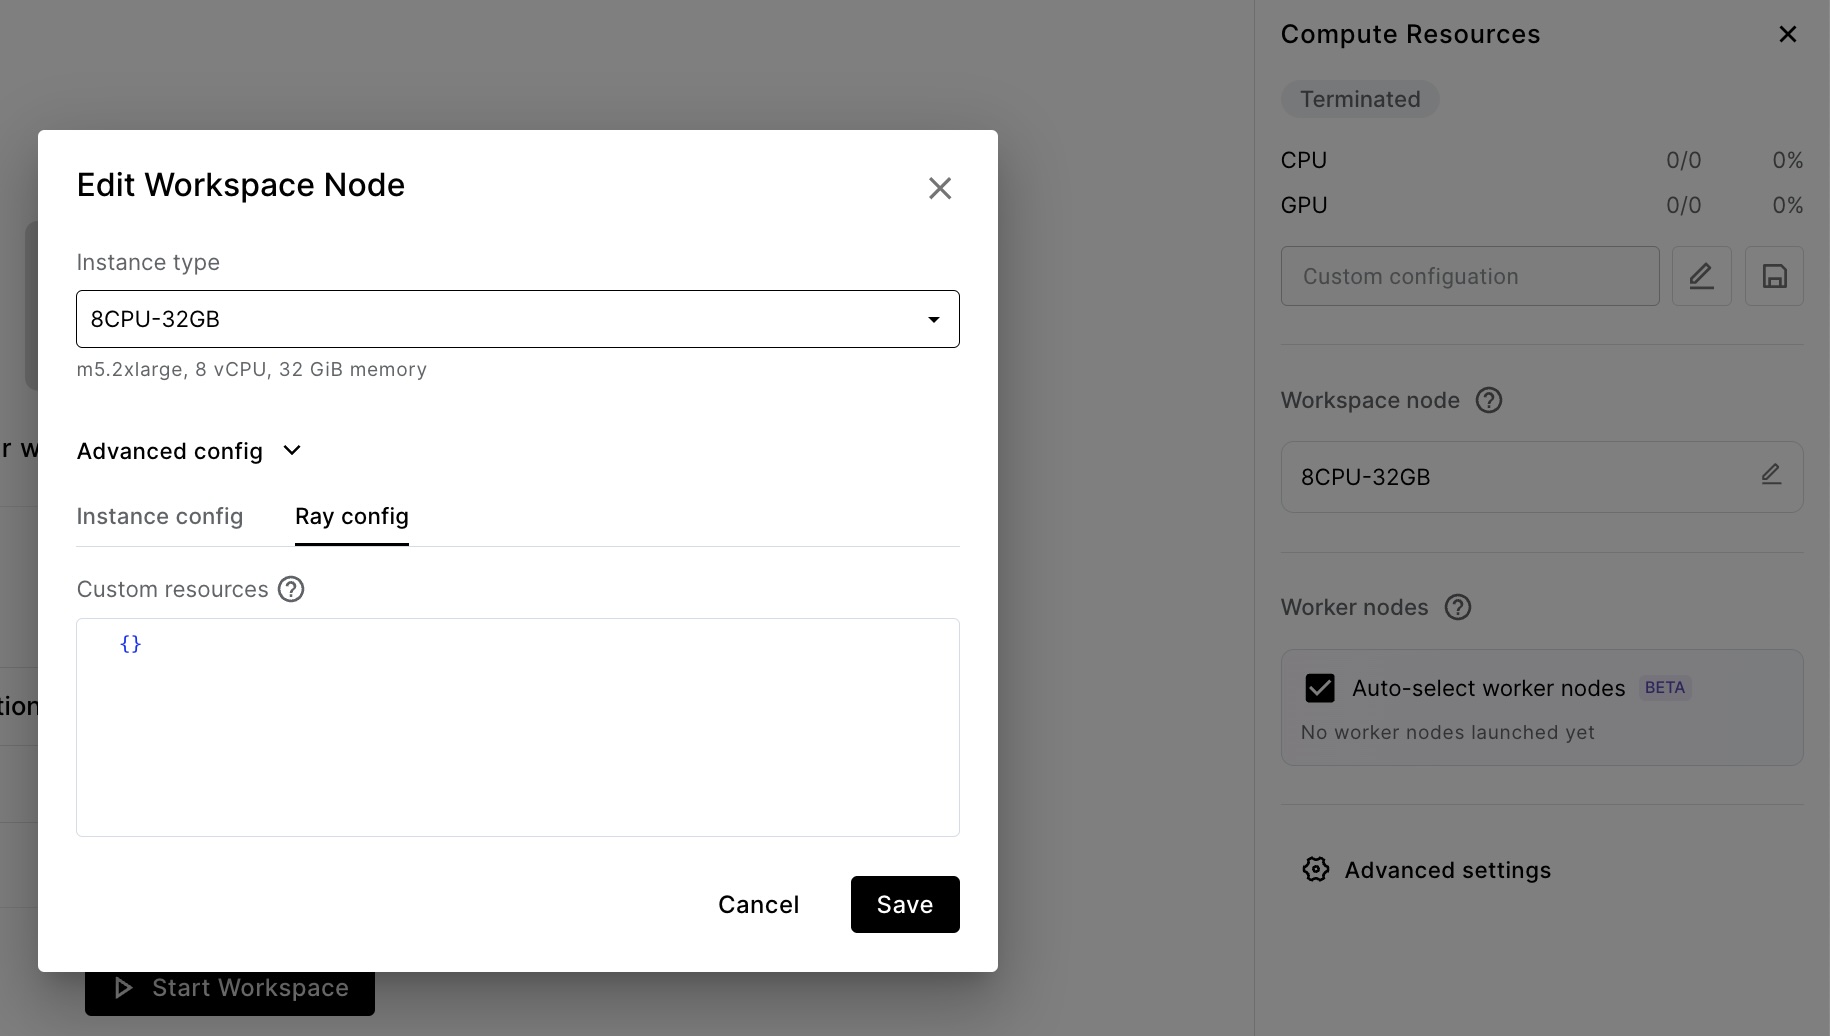
For multi-node clusters (those with worker nodes configured), all compute runs on worker nodes, and head node scheduling is disabled.
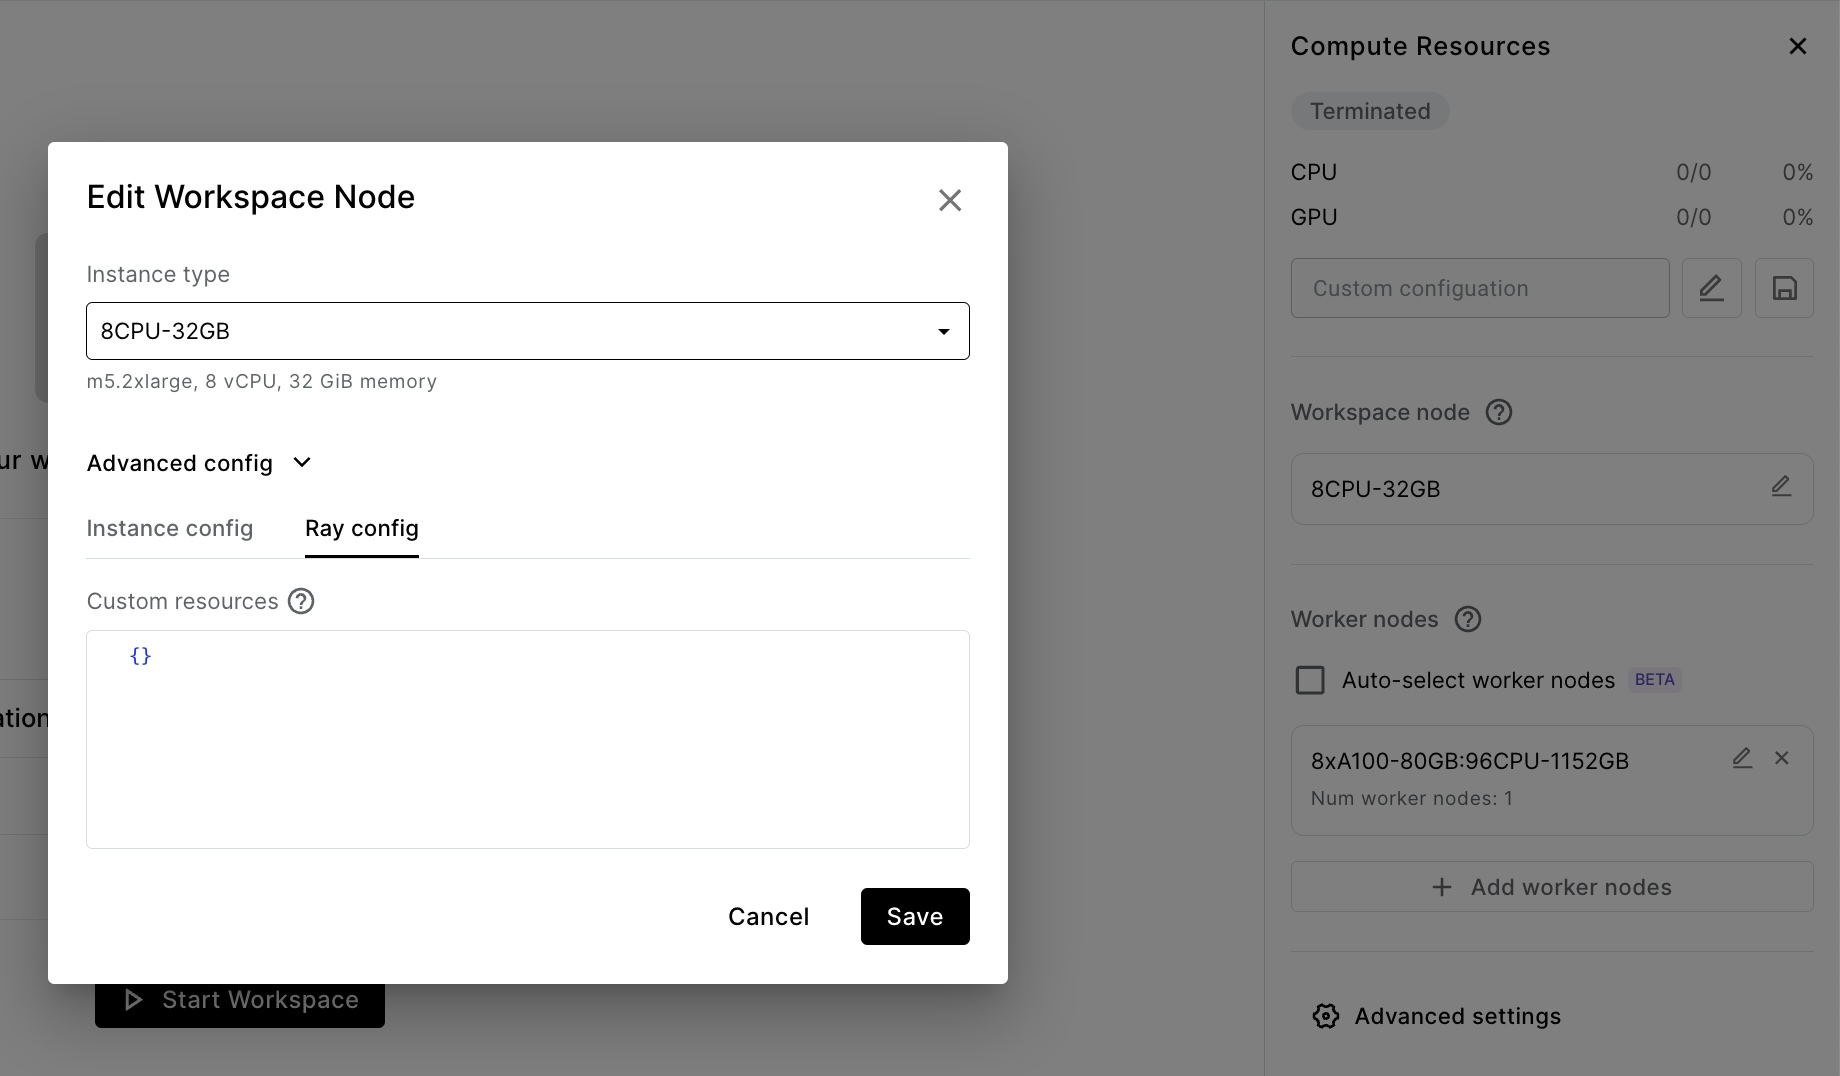
Head node scheduling may be achieved by specifying logical resources for the head node.
Changes to the anyscale Python SDK
The latest version of the anyscale SDK improves the job submission and compute configuration flow.
Submit an Anyscale Job through SDK
Before, the CLI provided the main way to submit jobs. With the new Python interface, you can submit jobs by passing in a JobConfig.
import anyscale
from anyscale.job.models import JobConfig

anyscale.job.submit(
    JobConfig(
      name="my-job",
      entrypoint="python main.py",
      working_dir="."
    ),
)
Auto-select worker nodes for compute configs
Typically when submitting Anyscale Jobs and deploying Anyscale services, you specify custom worker node groups through a compute configuration. With the new Python SDK, if you don't customize the compute_config, Anyscale auto-selects worker nodes that fit your workload.
- New compute config
- Old compute config
cloud: my-cloud

head_node:
instance_type: m5.8xlarge
worker_nodes: # Optional; Anyscale auto-selects worker node instances if empty. Set to [] for single node cluster.
  - instance_type: m5.8xlarge
    min_nodes: 5
    max_nodes: 5
  - instance_type: m5.4xlarge
    min_nodes: 1
    max_nodes: 10
    market_type: SPOT
cloud: my-cloud

head_node:
  instance_type: m5.8xlarge
worker_nodes: # If none specified, then it starts a single node cluster.
  - instance_type: m5.8xlarge
    min_nodes: 5
    max_nodes: 5
  - instance_type: m5.4xlarge
    min_nodes: 1
    max_nodes: 10
    market_type: SPOT
Container images replace cluster environments
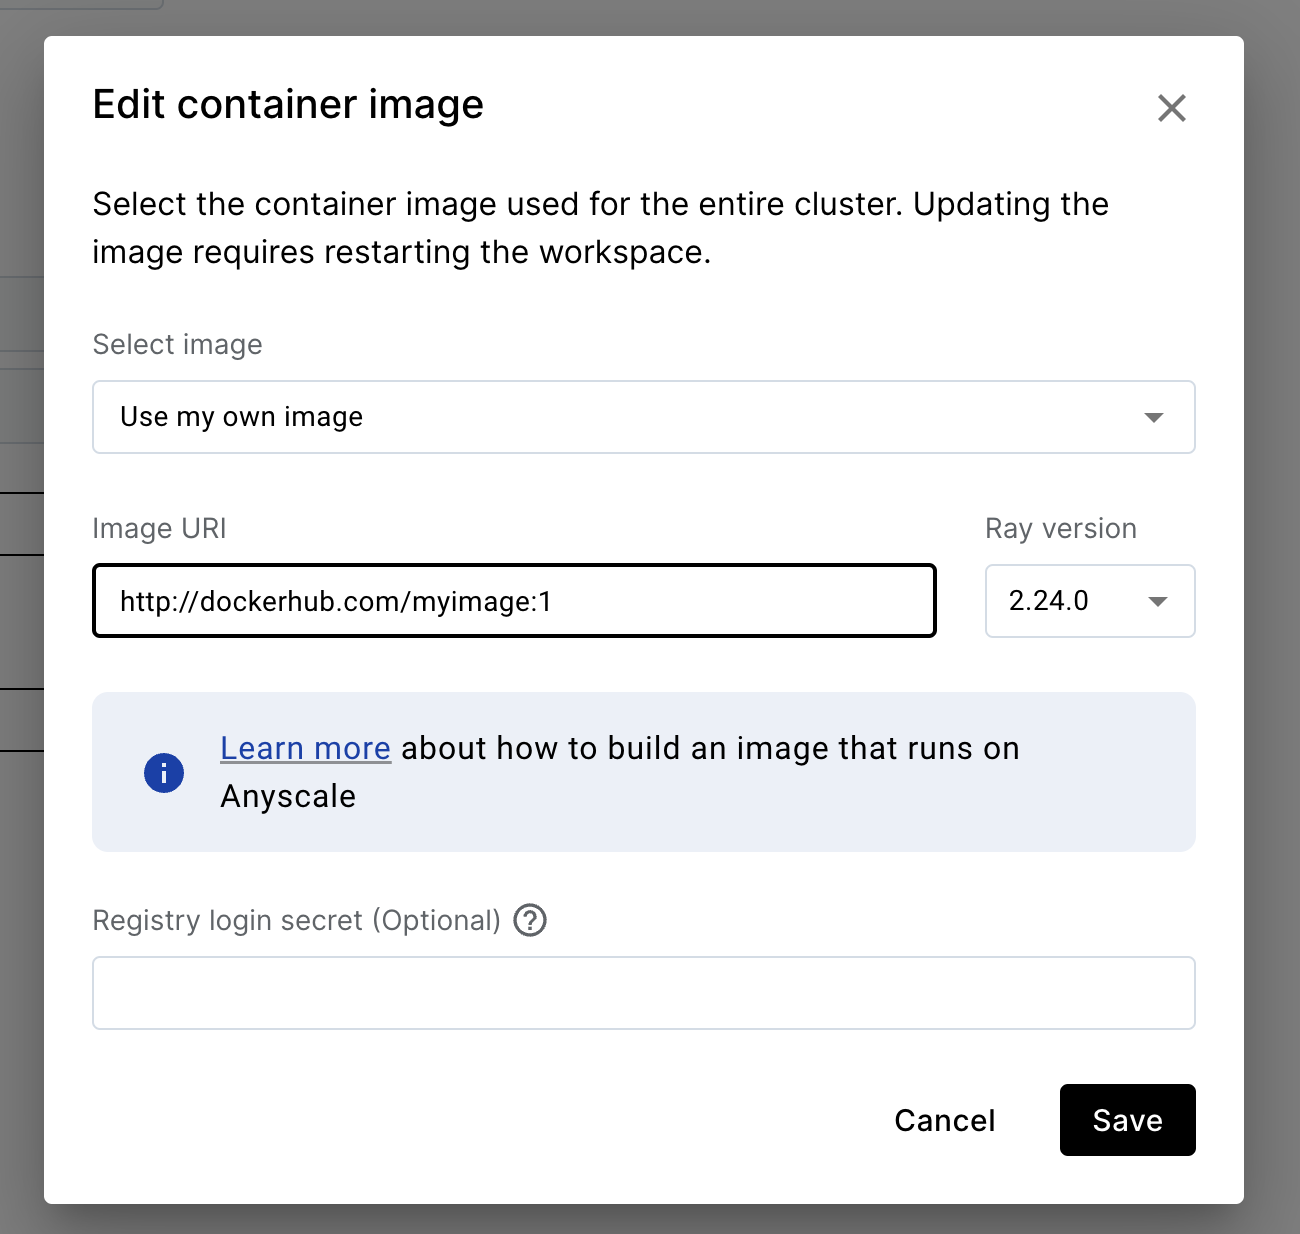
In the new design, Anyscale provides a Docker-like interface to define your environment. You can create a new container image through the UI or through the CLI/SDK. For either method, pass in an image URI or Containerfile to build an image, and then specify that image when launching workspaces, jobs, and services.
Existing cluster environments are automatically converted into container images and available for use in the new design.
For bringing your own Docker, pass in the image URI by selecting Dependency > Edit container image.
Changes to the anyscale CLI
The anyscale CLI remains backward compatible with previous commands. However, we recommend upgrading the package and modifying workflows to use the new interface as soon as possible.
The following table maps old commands to the equivalent in the new CLI. For a complete list of new commands beyond this mapping, see the API reference.
| Old CLI command | New CLI command |
|---|---|
anyscale job submit OLD_CONFIG.YAML | anyscale job submit -f NEW_CONFIG.YAML or anyscale job submit -- python main.py |
anyscale job logs --job-id 'prodjob...' --follow | anyscale job list |
anyscale service rollout | anyscale service deploy |
anyscale compute-config create | anyscale compute-config create -f NEW_CONFIG.YAML |
anyscale cluster-env build | anyscale image build -containerfile |
anyscale cluster-env get | anyscale image get |
What's next
We appreciate your continued trust in our services and look forward to bringing you more exciting updates. You can find more details on the new design in the latest version of the docs.
If you need help or have requests for improving the Anyscale user experience, reach out to us at support@anyscale.com.