Build your own image
Anyscale clusters can start with any image using the image_uri flag on jobs and services, however those images needs to adhere to Anyscale minimum requirements. In this guide we will build an end to end example of building an Anyscale compatible image locally, push it to a remote registry, and use it in Anyscale.
Getting started
Prerequisites
- A local installation of Docker (for building and pushing images).
- (Optional) Anyscale CLI version
0.5.50or higher, if you want to use the CLI to create cluster environments. - (Optional) (Amazon ECR access set up)(https://aws.amazon.com/ecr/)], if you want to access images stored in a private ECR repository.
Step 1: Build an Anyscale compatible image
Anyscale provides public base images pre-installed with all the necessary dependencies to run Ray on Anyscale, for example anyscale/ray:2.9.3. A full list of base images and their dependencies can be found here. Once you've selected a base image, you can create a Dockerfile with additional dependencies:
You can build an image that is not based on an Anyscale base image, however you must follow the specification outlined in the Image requirements reference.
# Use Anyscale base image
FROM anyscale/ray:2.9.3-py310

RUN sudo apt-get update && sudo apt-get install -y axel nfs-common zip unzip awscli && sudo apt-get clean

RUN pip install --no-cache-dir -U sympy

# (Optional) Verify that dependencies from the base image still work. This
# is useful for catching dependency conflicts at build time.
RUN echo "Testing Ray Import..." && python -c "import ray"
RUN ray --version
RUN jupyter --version
RUN anyscale --version
RUN sudo supervisord --version
Once you've created your Dockerfile, you can build and tag it with:
docker build -t <your-registry>:<your-tag> .
The Anyscale base images come with a default entrypoint set. Overwriting this entrypoint may break the Web Terminal and Jupyter notebook server when you launch your cluster. See this section for details on bypassing this entrypoint when running the image locally.
If your image is based on an image with Ray version 2.7.X or lower. See this section for details about apt-get update failures caused by legacy Kubernetes repository.
Step 2: Push your image
Push your image to a Docker registry. This is currently supported for the following registries:
- Any publicly accessible registry. For example, Docker Hub with no auth.
- Private cloud provider managed registries:
- [Amazon Elastic Container Registry Amazon ECR. See this guide for setting up access to private ECR on AWS.
- Google Artifact Registry. By default, Anyscale managed nodes on GCP have read access to images stored in Artifact Registry within the same project.
- Private third-party registries (Docker Hub, JFrog Artifactory, etc...). See this guide for setting up access to third-party registries.
See the following guides for details on pushing images to Amazon ECR:
See the following guides for details on pushing images to Artifact Registry:
Step 3: Use the image in Anyscale
- Workspace
- Job
- Service
For new workspaces:
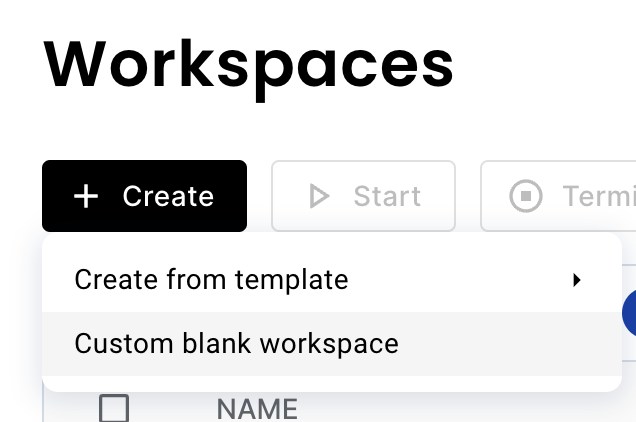
- Go to the workspaces page.
- Click on the Create button, then "Custom blank workspace."
- In the "Container image" section, select use my own image and configure the
image_uriand the Ray version.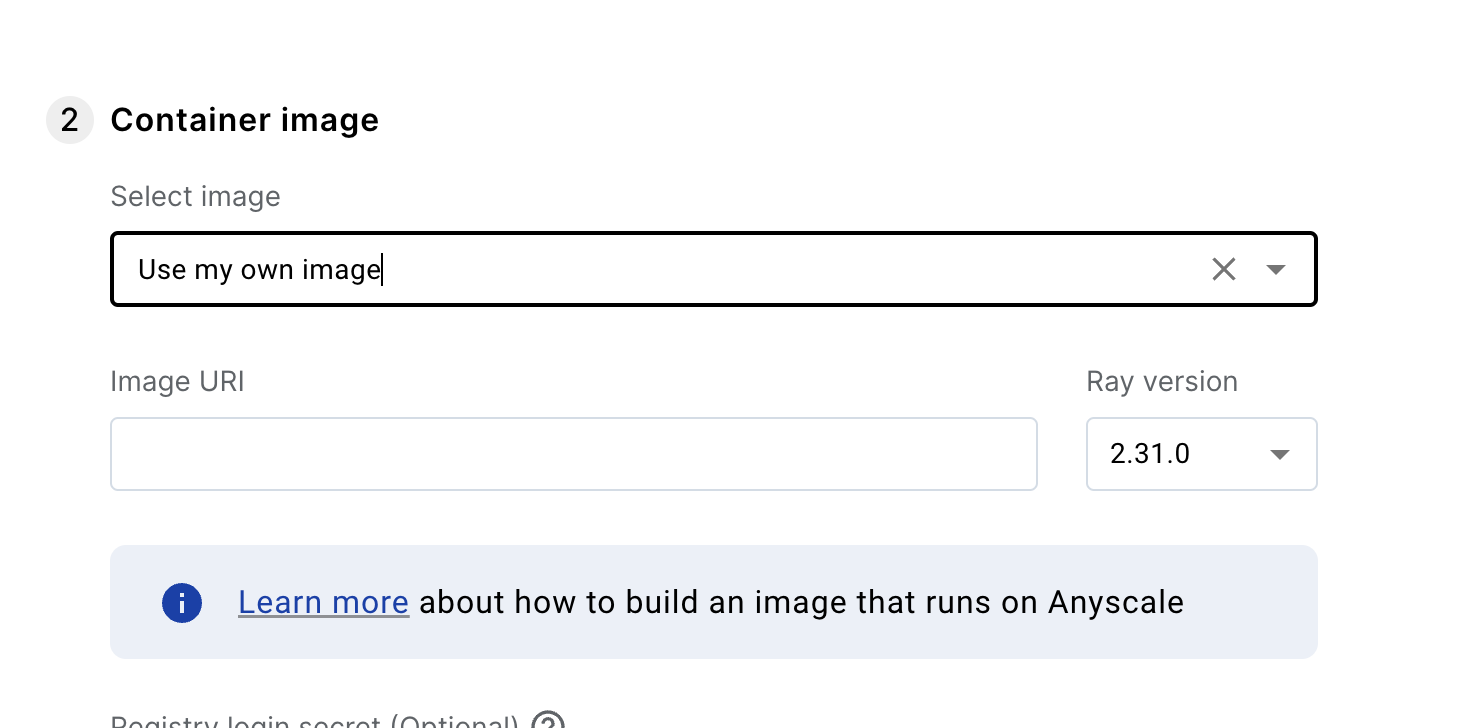
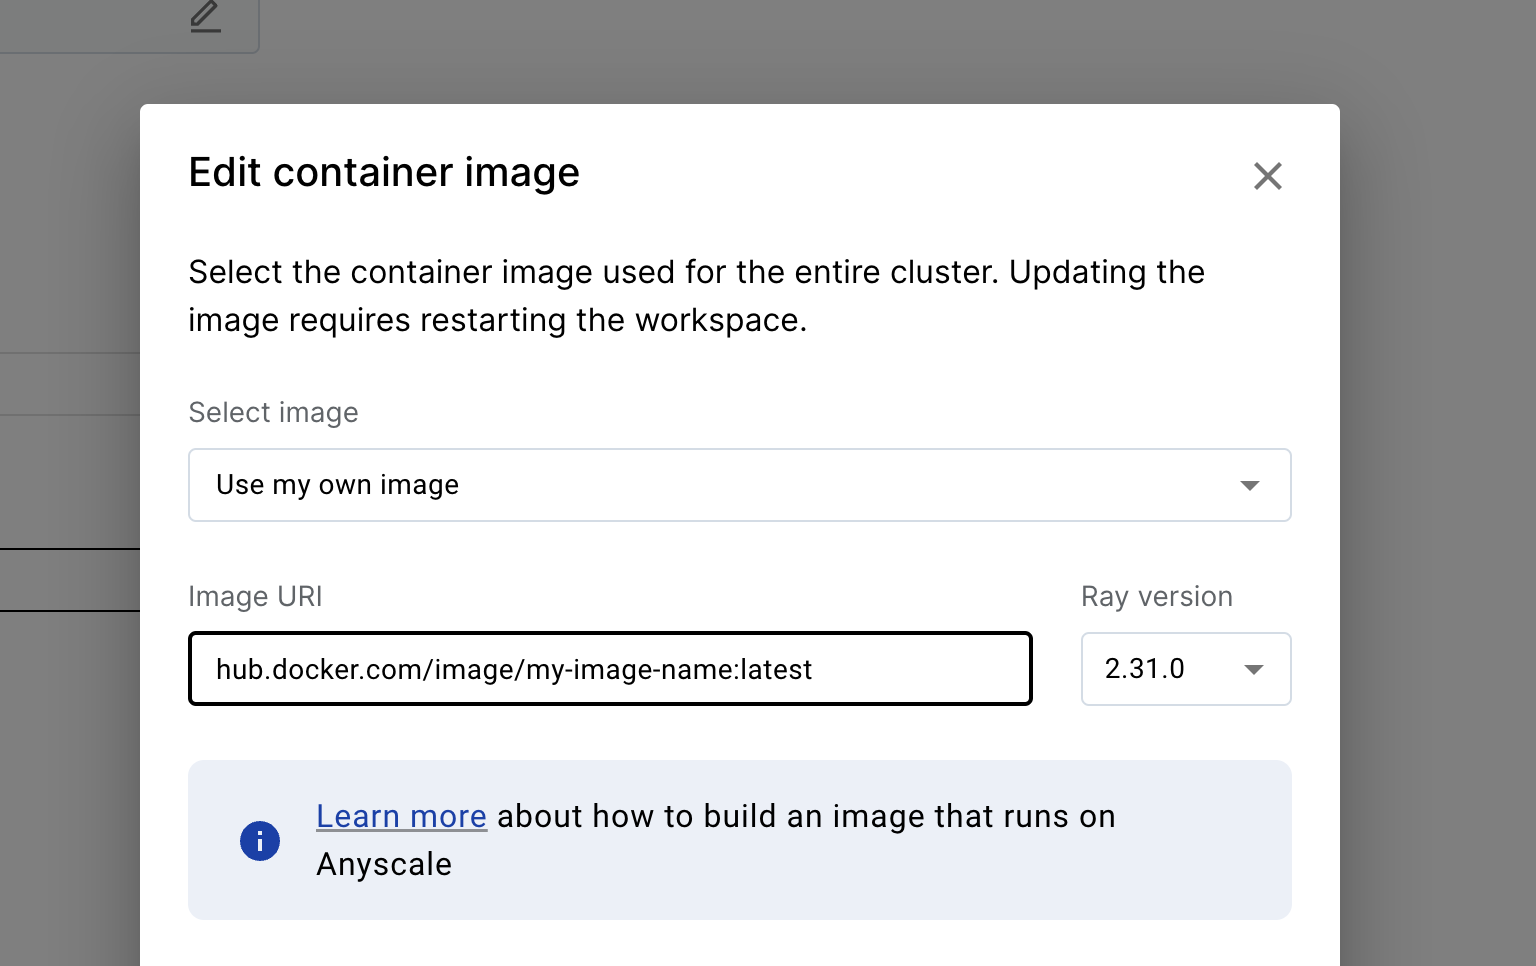
For existing workspaces:
- Go to the dependency tab
- Click the edit button on the container image.
- Select "Use my own image" option.
- From the CLI, you can pass as an argument:
# you can pass this in the command line
anyscale job submit -f job.yaml --image-uri hub.docker.com/image/my-image-name:latest --ray-version 2.30.0
Or you can pass inside the job configuration.
# or you can add it to the config of the job
image_uri: hub.docker.com/image/my-image-name:latest
ray_version: 2.30.0
...
- From the SDK:
import anyscale
from anyscale.job.models import JobConfig

anyscale.job.submit(
    JobConfig(
        name="my-job",
        image_uri="hub.docker.com/image/my-image-name:latest",
        ray_version="2.30.0",
    ),
)
- From the CLI, you can pass as an argument:
anyscale service deploy -f service.yaml --image-uri hub.docker.com/image/my-image-name:latest --ray-version 2.30.0
Or you can pass inside the service configuration.
image_uri: hub.docker.com/image/my-image-name:latest
ray_version: 2.30.0
...
- From the SDK:
import anyscale
from anyscale.service.models import ServiceConfig

anyscale.service.deploy(
    ServiceConfig(
        name="my-service",
        image_uri="hub.docker.com/image/my-image-name:latest",
        ray_version="2.30.0",
    ),
)
Troubleshooting
Debugging cluster startup failures
To troubleshoot clusters that won't start up, start by looking in the cluster's Event Log for any helpful tips.
Debugging Ray container utilities (Jupyter, VS Code, Web Terminal)
To troubleshoot issues with utilities that are run inside of the Ray container, the following log files may be useful:
/tmp/ray/jupyter.log- Jupyter log/tmp/ray/vscode.log- VS Code log/tmp/ray/web_terminal_server.log- Web Terminal system log
Running the image locally
When doing docker run -it <your-image>, you may run into an error similar to the following:
Error: Format string '/home/ray/anaconda3/bin/anyscale session web_terminal_server --deploy-environment %(ENV_ANYSCALE_DEPLOY_ENVIRONMENT)s --cli-token %(ENV_ANYSCALE_CLI_TOKEN)s --host %(ENV_ANYSCALE_HOST)s --working-dir %(ENV_ANYSCALE_WORKING_DIR)s --session-id %(ENV_ANYSCALE_SESSION_ID)s' for 'program:web_terminal_server.command' contains names ('ENV_ANYSCALE_DEPLOY_ENVIRONMENT') which cannot be expanded. Available names: ENV_BUILD_DATE, ENV_HOME, ENV_HOSTNAME, ENV_LANG, ENV_LC_ALL, ENV_LOGNAME, ENV_PATH, ENV_PWD, ENV_PYTHONUSERBASE, ENV_RAY_USAGE_STATS_ENABLED, ENV_RAY_USAGE_STATS_PROMPT_ENABLED, ENV_RAY_USAGE_STATS_SOURCE, ENV_SHELL, ENV_SUDO_COMMAND, ENV_SUDO_GID, ENV_SUDO_UID, ENV_SUDO_USER, ENV_TERM, ENV_TZ, ENV_USER, group_name, here, host_node_name, process_num, program_name in section 'program:web_terminal_server' (file: '/etc/supervisor/conf.d/supervisord.conf')
This is caused by Anyscale's custom entrypoint, which requires certain environment variables set to work. To get around this, you can manually override the entrypoint when running the image with the following command:
docker run -it --entrypoint bash <your-image>
This will give you an interactive shell into the image locally.
Docker write: no space left on device
If you’re pulling a large image, you may run out of disk space on your nodes. You can work around this by configuring a larger volume in your compute config’s advanced options:
- Navigate to Configurations->compute configs in the Anyscale console.
- Select "Create new config"
- Navigate to the Advanced configuration section near the bottom of the page.
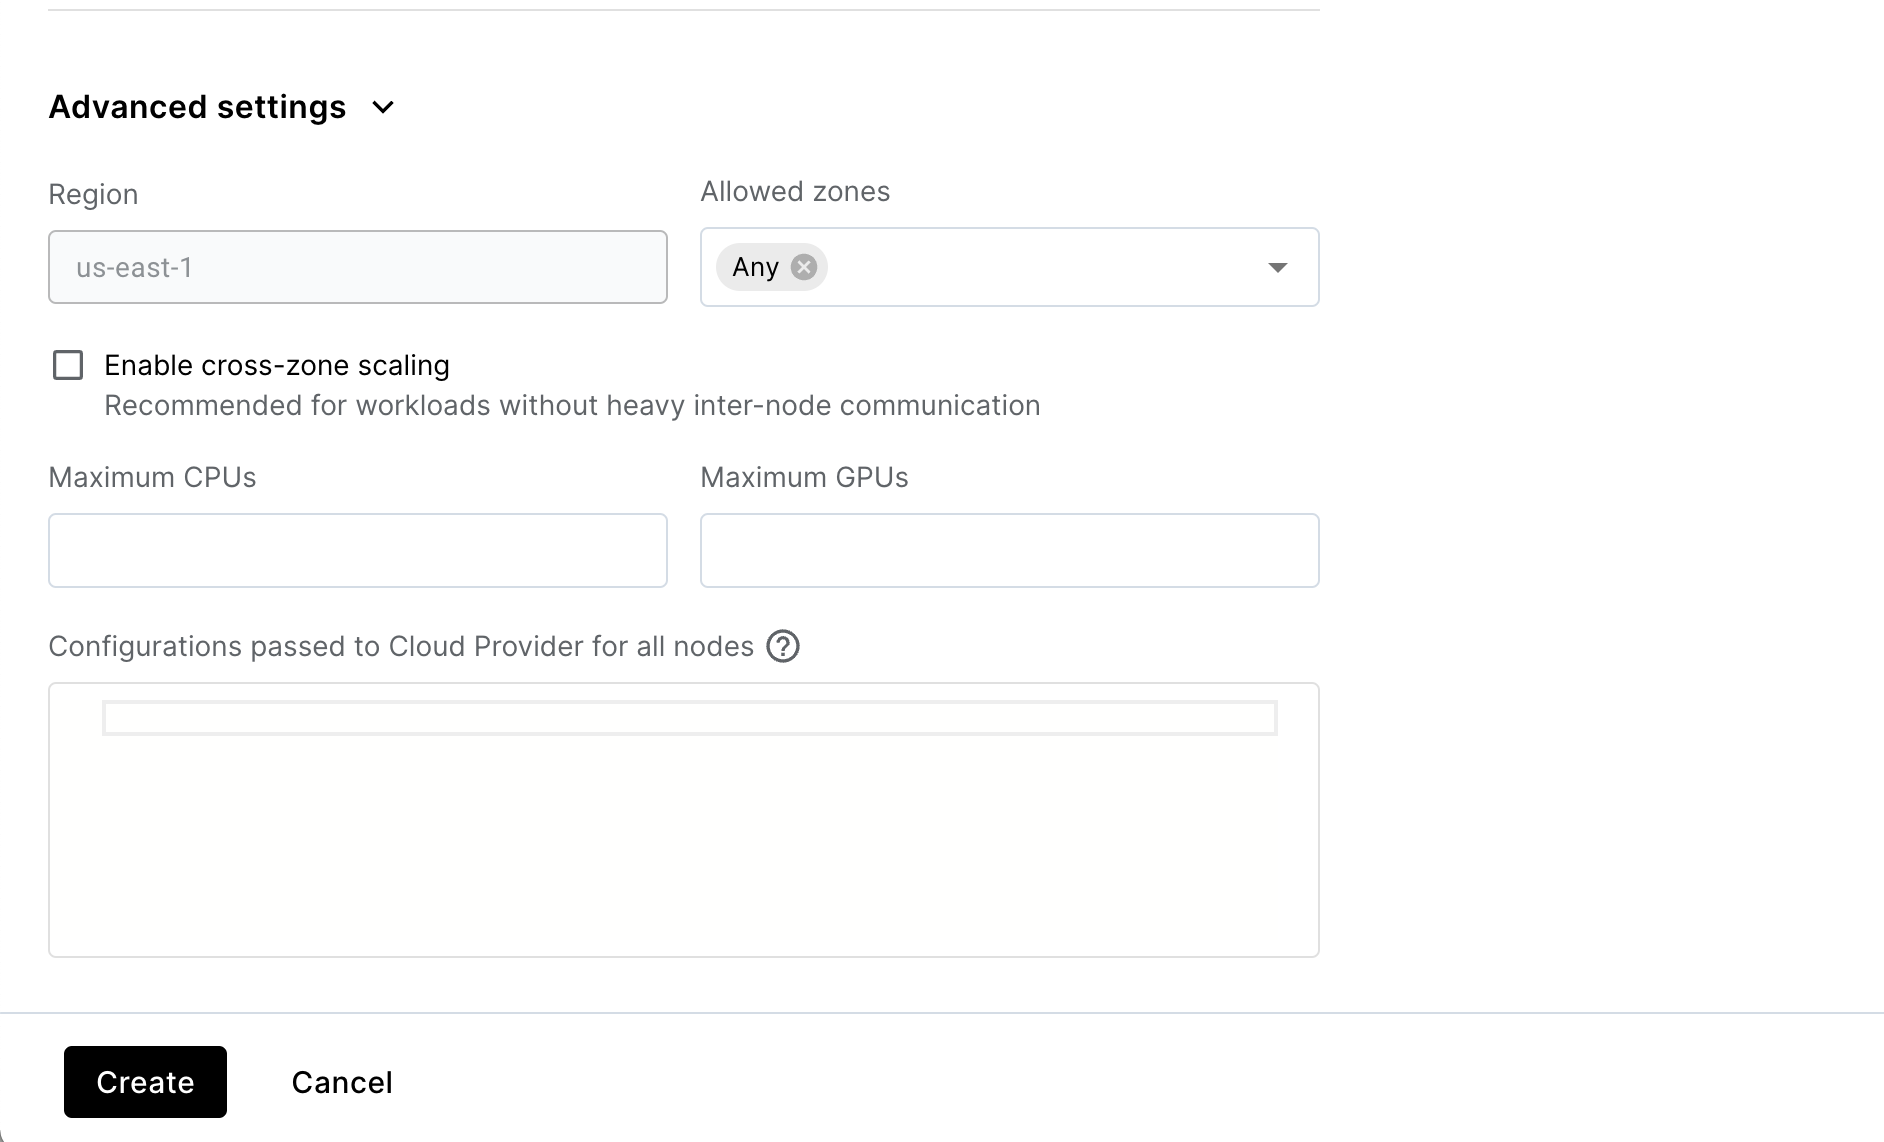
- Add the following configuration to the Advanced configuration setting to attach a 250 GB volume (you can tune this to an appropriate size for your image).
{
  "BlockDeviceMappings": [
    {
      "DeviceName": "/dev/sda1",
      "Ebs": {
        "VolumeSize": 250,
        "DeleteOnTermination": true
      }
    }
  ]
}
Note that "DeleteOnTermination" should be set to true to clean up the volume after the instance is terminated.
Installing stable versions of Ray on top of nightly CUDA images
Older versions of Ray may not have base images available for newer versions of CUDA. In this scenario, you can use the nightly base images and reinstall a stable version of Ray on top of the nightly image. For example, to use CUDA 12.1 with Ray 2.5.0, you can create a Dockerfile similar to the following:
FROM anyscale/ray:nightly-py310-cu121

pip uninstall -y ray && pip install -U ray==2.5.0
If the version of CUDA you need isn't already supported in the nightly images, contact support.
Docker: Error response from daemon: no basic auth credentials.
This section assumes that Anyscale nodes are launched into your account with the <cloud-id>-cluster_node_role role. If your nodes are being launched with ray-autoscaler-v1, or if you are using a custom AWS IAM role then you can apply the same steps to that role instead to grant ECR access.
This error can happen if the nodes launched in your account don't have permission to pull the image you specified. If you're using Amazon ECR to host your images, check that you've completed the Amazon ECR access set up steps. In particular, make sure that:
- The
<cloud-id>-cluster_node_rolerole has theAmazonEC2ContainerRegistryReadOnlypolicy attached. - The private ECR repository allows pulls from nodes with the
<cloud-id>-cluster_node_rolerole. This is necessary if the private ECR repository is in a separate account from your EC2 instances.