Tuning Configs for Cost or Performance
Making models train faster is directly related to reducing the cost. But that is not the only objective that you could optimize. Some people may not have access to the latest and greatest Nvidia GPUs, but still want to fine-tune LLMs on cheaper GPUs like L4s or A10s. So within this limitation you also want to 1) unblock yourself (even if it means more $/flops) and 2) optimize for best configuration while maintaining the quality of the models. In this guide, we will discuss the parameters that are exposed that can help squeeze more flops out of GPUs and train models faster.
Overview
Picking the correct type of GPUs and right combination of configuration is not easy to prescribe. It usually comes down to running benchmarks yourself and be able to quickly understand the trade-offs for speed and memory. There is a large collection of tutorials on the internet that can give you holistic view of how to think about performance of training LLMs. The following two are very good resources:
- https://sumanthrh.com/post/distributed-and-efficient-finetuning/
- https://github.com/stas00/ml-engineering/blob/master/training/performance/README.md (more advanced)
When thinking about training models, there are two issues that come up in order of importance:
- What parameters should I set to make sure I do not run out of GPU Memory (hit CUDA OOM) during training?
- What parameters would give me a better throughput and therefore reduce my cost?
In order to fit a large model (say 70B sized model) the priority is first fitting the model. If you cannot train the model even with batch size = 1, then increasing batch size may not help.
How do you benchmark throughput yourself?
For benchmarking we want to fix context length to a constant value so that it does not vary across different batches. To do this we need to make padding strategy max_length (the default is longest). If you use longest, you may observe that you did not run out of memory for a few iteration but then did in a later iteration and you might miss that during initial profiling. This is because the context length of the batch can vary at every iteration and we want to remove that as a confounding factor, so in the config YAML make sure you have the following:
padding: "max_length"
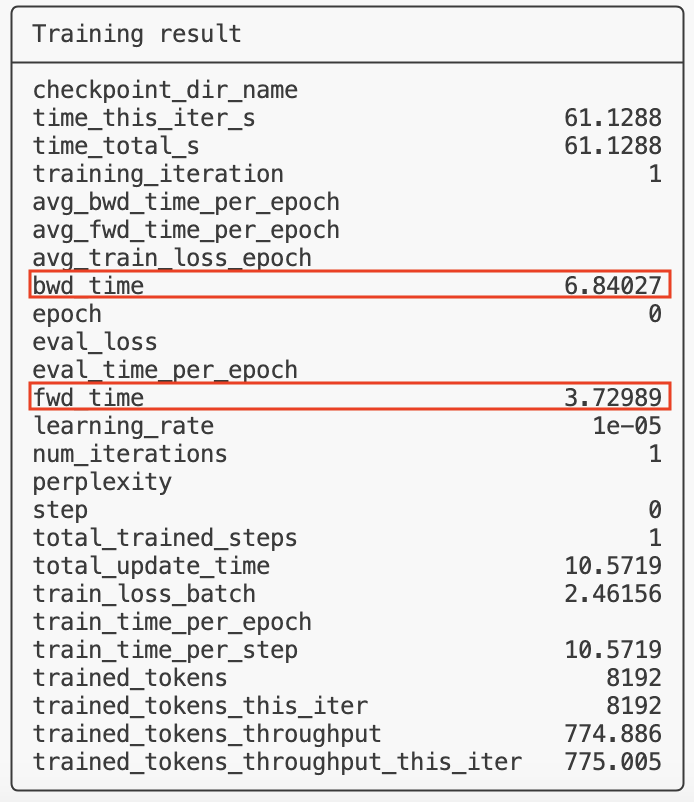
Then you want to run the LLMForge fine-tuning and run the job for a few iterations to note down the time it takes for different steps. In the logs, we print a table with what you need, but you also can go to WANDB and obtain the metrics from there.
llmforge anyscale finetune <path_to_config.yaml>
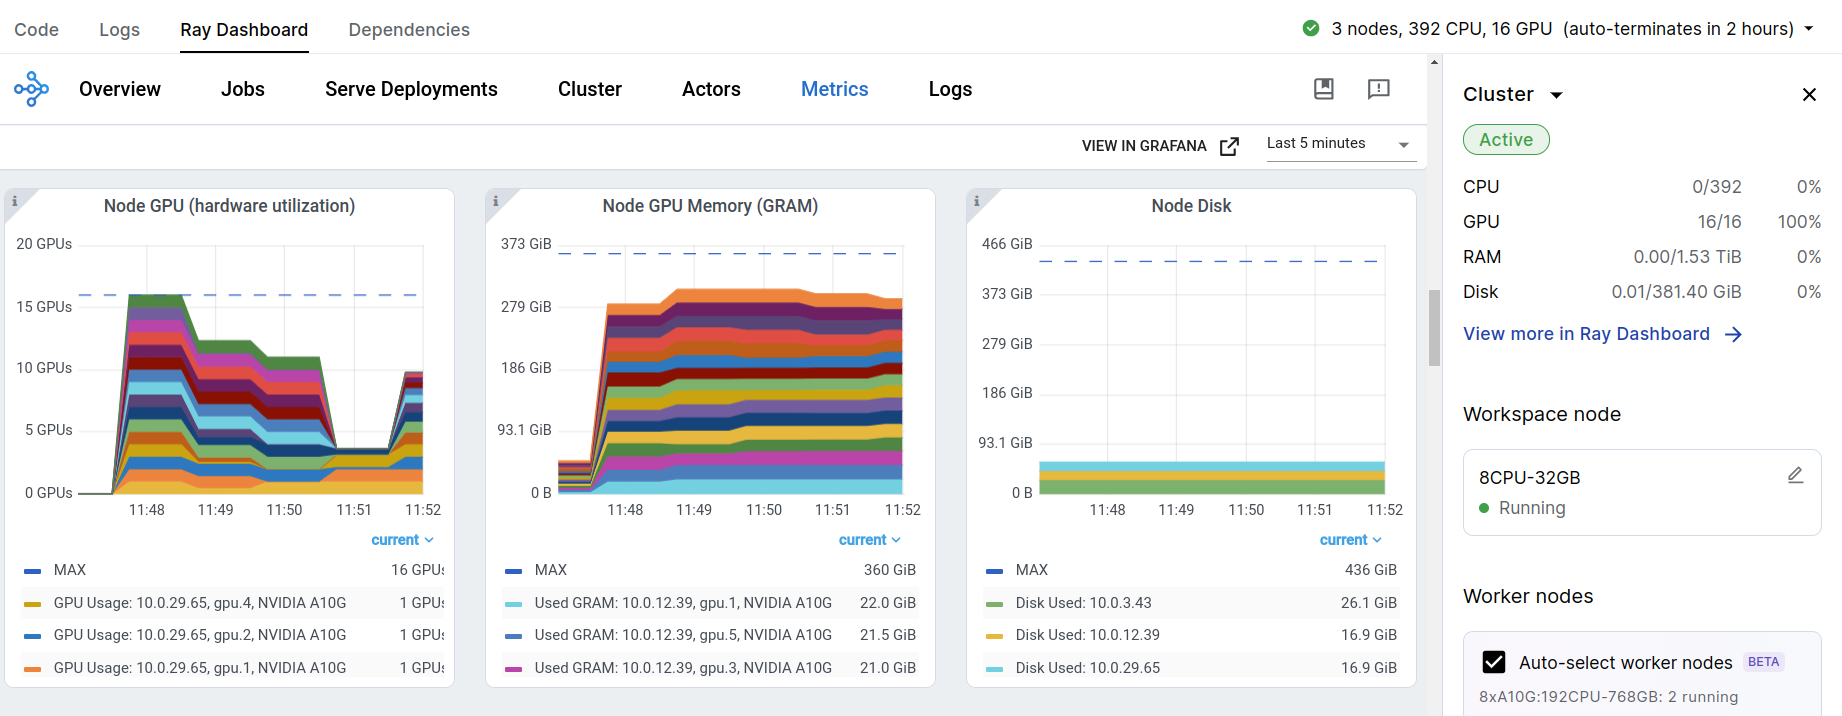
For GPU memory, you basically want to see if you hit any OOM errors during training. You can monitor GPU utilization by looking at the Ray dashboard while the training profile is running.
For speed, the metrics that are important during profiling are fwd_time and bwd_time. These metrics are good enough to capture the relative improvements in the throughput to understand the trade-off between different choices.
Model Flop Utilization (MFU) (read more here) is usually calculated as a measure for efficiency of hardware utilization for training:
MFU = (Approximate model flops during fwd + bwd pass) / (total update time per step) / (Hardware TFLOPS)
And here is a rough breakdown of how each thing should be plugged in:
Approximate model flops during fwd + bwd pass = 2 * 3 * ctx_len * bs_per_device * num_model_params
The factor 2 is for conversion of MACs to Flops, 3 is for approximation of the fact that backward pass takes ~2x more flops than forward pass.
total update time per step ~ fwd_time + bwd_time
In reality this should include data ingestion speed as well, but we assume this is not significant since we are using Ray Data to overlap ingestion with compute.
Hardware TFLOPS = Per device flops capacity per GPU spec and the data type tensor cores
For example for A100s when doing bf16 training this is 312 TFLOPS.
You can use this methodology to compute MFUs and compare different configurations with each other.
Here is some performance numbers we measured (in Jan 2024)
1xP4DE.24xlarge (LoRA)
The numbers below were measured on a 1xP4DE node with 8xA100-80 for LoRA fine-tuning. The effective cost computed here is based on the hourly rate of on-demand price on AWS (that is $40.77/hr). The charge is still based on instance hours used, but this gives a good comparison basis to token-based pricing. This cost does not consider startup time, checkpointing, etc
Llama-2-7B
| Context Length | Bsize per device | Token Throughput -- TT (MT/hr) | MFU | Effective Cost ($/MT) |
|---|---|---|---|---|
| 512 | 64 | 101.47 | 0.47 | 0.74 |
| 1024 | 32 | 103.7 | 0.48 | 0.72 |
| 2048 | 8 | 99.75 | 0.47 | 0.71 |
| 4096 | 4 | 102.58 | 0.48 | 0.69 |
Llama-2-70B
| Context Length | Bsize per device | Token Throughput -- TT (MT/hr) | MFU | Effective Cost ($/MT) |
|---|---|---|---|---|
| 512 | 16 | 11.23 | 0.53 | 3.05 |
| 1024 | 8 | 9.65 | 0.45 | 4.77 |
| 2048 | 4 | 8.58 | 0.40 | 4.25 |
| 4096 | 2 | 13.40 | 0.63 | 3.65 |
Mixtral-8x7B
| Context Length | Bsize per device | Token Throughput -- TT (MT/hr) | MFU | Effective Cost ($/MT) |
|---|---|---|---|---|
| 512 | 64 | 59.73 | 0.56 | 0.41 |
| 1024 | 32 | 57.20 | 0.53 | 0.40 |
| 2048 | 16 | 56.85 | 0.53 | 0.40 |
| 4096 | 8 | 55.84 | 0.52 | 0.40 |
Configurations
In this section we cover a set of configurations that allow more customization in throughput optimization. Visit docs for more info.
Instance type
You can modify the cluster configuration by changing worker_resources and trainer_resources.
The following is how you specify different GPU types in the YAML:
| GPU type | Resource Specification in YAML |
|---|---|
| A10 | accelerator_type:A10G: 0.001 |
| L4 | accelerator_type:L4: 0.001 |
| A100-40G* | accelerator_type:A100-40G: 0.001 |
| A100-80G* | accelerator_type:A100-80G: 0.001 |
| H100* | accelerator_type:H100: 0.001 |
* subject to availability.
For example, if you want to train on A100-80G GPUs, you can specify the following in the YAML:
num_devices: 8
trainer_resources: {}
worker_resources:
  accelerator_type:A100-80G: 0.001
All of our default configs are setup for A10G machines due to better accessibility.
Difference between worker_resources and trainer_resources
In LoRA training you can often ignore trainer_resources and just provide the GPU type required for doing training under worker_resources similar to the example above.
However, for full-parameter training on heterogeneous clusters (for example training 70B on A10G GPUs) it is a bit more convoluted. This is generally not recommended, but when you do not have access to X100 machines this is the only way you can still train super large models (fp16 and full-parameter).
Ray Train allows users to specify a different set of resources for rank-0 vs. other ranks. Rank-0 is responsible for checkpointing and normally needs more CPU RAM than the other workers at the time of checkpointing, because of the implementation details around weight aggregation. In a heterogeneous multi-node setting where you have both small nodes and large nodes with the same GPUs this can cause a problem, because it becomes important where rank-0 is stored and the cluster is not symmetrically used all the time.
A prime example is running fine-tuning on A10Gs. On AWS A10s are available in g5.4xlarge with 1 GPU and small RAM capacity all the way to g5.48xlarge with 8 GPUs and large RAM. During checkpointing a large model like 70B, the CPU RAM on g5.4xlarge is not sufficient and hence we have to define memory requirement for trained_resources to ensure that the large instance gets picked for rank-0:
num_devices: 32
# Rank-0 (aka trainer) should have 140 GB memory
# This memory is required for weight aggregation.
trainer_resources:
  memory: 150_323_855_360 # 140 GB memory

# Accelerator type, the value of 0.001 is not important, as long as it is
# between 0 and 1. This ensures that the given accelerator is available for each trainer
# worker.
worker_resources:
  memory: 53_687_091_200 # 50 GB memory
  accelerator_type:A10G: 0.001
This configs is asking for 32xA10G GPUs but does not specify the architecture (for example g5.4xlarge vs. g5.48xlarge). However, it specifies that there should be at least 130G of memory available for rank-0, which forces the Anyscale's instance manager to pick g5.48xlarge for rank-0 and any other A10s for other workers hence not hitting RAM OOM issues during checkpointing. This is much better than being forced to use 4xg5.48xlarge nodes. They may not be available on-demand and might be more expensive too. The Anyscale autoscaler will prioritize instances with the highest number of GPUs to maximize locality. If there is insufficient capacity, it will proceed to select multiple instances in decreasing order of their GPU count.
Batch size and Context length
Usually for large models we want to saturate the GPUs memory by choosing the largest batch size before we OOM. If you tried to fit a micro batch size of 4 and it ran out of memory, but 3 fits instead of 2. Because, sequence length dimensions are mostly flattened for linear layer computation the batch size for batch matrix-multiplication is sequence_length x batch_size_per_device. So the GPUs would remain in their high-performant regime even if batch size is seemingly small.
To increase batch size beyond the capacity of GPUs, you either need to user more instances, or use gradient accumulation which may be a better option when the difference is between multi-node vs. single node.
If you don't specify batch size or context length, Anyscale automatically infers based on some heuristics that may not be optimal for your use case. Anyscale chooses batch size using a look up table of previous runs based on the context length. Anyscale chooses the context length to be the maximum of the model's default context length and the 95th percentile of the sequence length of the dataset.
To change these configs you can simply do:
context_length: <ctx_length>
train_batch_size_per_device: <bs>
# You can also change the validation batch size
eval_batch_size_per_device: <bs>
DeepSpeed configs
By default, use Zero-DP stage 3 with parameter and the optimizer's state offloading, which is the safest in terms of memory consumption. But this setting is not the fastest. You can find other typical DeepSpeed configurations under deepspeed_configs. Find the complete doc of all the configurations on the DeepSpeed doc page.
You can try deactivating parameter offloading for smaller models to speed the training up, if you still have room before running out of memory or your context length is small enough to leave some room for memory. You can also change the states of Zero-DP to see how they speed the training up for your use-case. In the YAML all you have to do is change something like:
deepspeed:
  config_path: deepspeed_configs/zero_3.json
You can also set different stages of Zero-DP to see how they affect the training speed.
- Stage 0
- Stage 1
- Stage 2
- Stage 3
Description: This stage represents the baseline without any memory optimizations. All optimizer states, gradients, and parameters are fully replicated across all GPUs.
Description: Partitions the optimizer states across GPUs. This reduces memory consumption by distributing the optimizer states, which include variables like momentum and variance for Adam optimizer.
Benefits: Reduces memory usage but not as significant as higher stages. Suitable for models where optimizer states are a major memory bottleneck
Description: Extends Stage 1 by also partitioning gradients across GPUs. This further reduces memory usage by distributing both optimizer states and gradients.
Benefits: Provides more significant memory savings compared to Stage 1. It is more efficient and often at parity with Distributed Data Parallel (DDP) due to optimized communication protocols
Description: The most advanced stage, which partitions optimizer states, gradients, and model parameters across GPUs. This stage can also optionally shard activations.
Benefits: Allows for massive scaling, enabling the training of models with over 40 billion parameters on a single GPU and over 2 trillion parameters on 512 GPUs. It provides the highest memory efficiency and is essential for extremely large models.
Additional features:
- ZeRO-Offload: Allows offloading optimizer states and gradients to CPU or NVMe, further reducing GPU memory usage. This is particularly useful for training very large models on limited GPU resources
Activation checkpointing
Activation checkpointing allows you decrease memory usage for computing backpropagation by not saving the activations at all the layers and instead recomputing the activations as you are backpropagating. There is some overlaps between backward pass and activation checkpointing to minimize the overhead but at the end of the day you are spending more Flops and it will have some negative impact on throughput.
So if you have room for GPU memory, one of the ways you can increase throughput is by turning activation checkpoint off. Having said that, most of the time the impact on memory is so big that we usually see OOM errors after turning it off. To turn it off you can update the YAML:
no_gradient_checkpoint: True
Gradient accumulation
Gradient accumulation is another way of increasing the batch size without using more instances. This can become useful when the increasing batch size directly would require going multi-node and the node-interconnects are slow. It might be better to increase the gradient accumulation step in these cases to get less slower than going multi-node. To do this you can easily configure the gradient_accumulation_steps parameter in the YAML:
gradient_accumulation_steps: 2